In this post I am going to show you how to create a great hero image for the homepage of your website.
What is a Hero Image?
This is the image that appears at the top of the page and is the first graphic a visitor sees. This is an important part of web design. So, you want to show them a good, relevant graphic image.
The example below shows the hero image for my website, Blue Lacy SEO.

Two Options for a Hero Image
- Use your own image. Make sure this is a high-quality image that is related to your business.
- Use a stock image. Here is a list of several high-quality image sites. Most of these have free and paid options.
- Stock Unlimited
- Pixabay (https://pixabay.com)
- Unsplash
- Pexels (https://www.pexels.com/discover)
- Picjumbo
- Burst
- Videvo (video)
Download and Save an Image
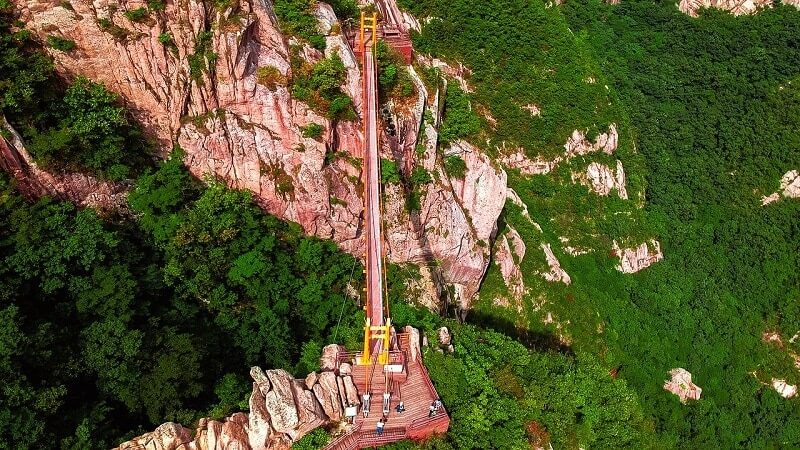
I looked for a suitable image for a fictional aerial drone photography service. I found a great looking image that shows foot bridge.
I was presented some download options for this image, as shown below.
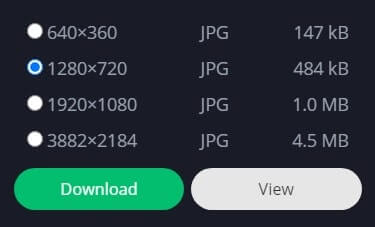
The largest size was 3882×2184 (width x length) pixels with file size of 4.5 MB. This option is way too big for a website image and will cause your webpage visitor to wait for this image to appear.
The next option is 1920×1080 pixels with a file size of 1.0 MB. This is the size of many desktop and laptop screens but is still too big for our purposes.
The download option I chose is 1280×720 pixels, which is a good size for a full width image for a website page. The size is only 484 KB.
Let me explain the difference between MB (megabyte) and KB (kilobyte). Kilo stands for 1,000, so a thousand KB is equal to 1 MB. The first download option for our image is 4.5 MB in size and is equal to 4,500 KB. This gives you a better idea of the disparity in file sizes in our image download options.
Image Compression
The image I selected is in the JPEG (Joint Photographic Experts Group) format. This is a commonly used method of lossy compression for digital images.
I wanted to further compress this image without losing quality for faster page speed. I used a free online application called Tiny JPG. This application will further compress the image for use on a website.
After compression, my aerial image went from 484 KB to 424 KB. It’s not a big reduction, but it helps.
There are also image optimization plugins for WordPress. Here is a list of some of the better ones. These plugins will compress all your images as they are uploaded to the Media section in WordPress. If you have a lot of images to compress, these plugin apps will save you a lot of time.
Most of these have free and paid options.
- Smush
- EWWW Image Optimizer
- ShortPixel
- Optimus
- Imagify
Install a New Theme for WordPress
For the purpose of this article and video, I installed a new theme from Astra. If you are new to WordPress, I would recommend working from a theme until you are proficient with WordPress. You can use any WordPress theme.
After installing the basic Astra theme, I installed the Astra Starter templates and chose a suitable template for this demo.
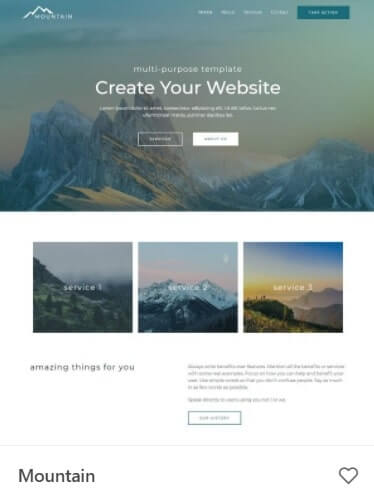
The Mountain template has a hero image that is approximately the same size as my aerial photography image.
Uploading the Image and Using a Page Builder
The Mountain Astra theme has a nice hero image and I am going to change that to the new aerial photo photography image.
I’m also going to be using a page builder called Elementor. You can use any page builder, such as Beaver Builder, Divi, or even the WordPress built-in page builder, Gutenberg.
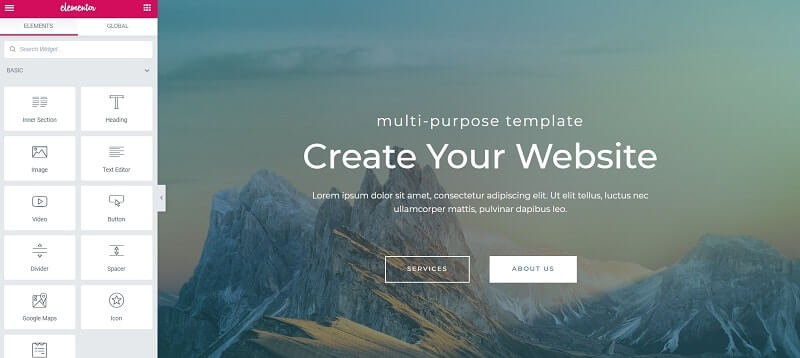
With the Elementor page builder loaded, I can then change the image.
To see how to install the new image refer to the Create a Great Hero Image for Your Website video.